
The fastest way to get outdoor Halloween lighting right is to stop shopping by the strand. Start planning by the zone instead. Your porch needs warm string lights. Along the walkway, space low lights every 4 to 6 feet so nobody trips. The yard needs one or two colored spotlights for drama, while the bushes just need a net light thrown over them. Add one timer so the whole display switches itself on at dusk, and use only outdoor-rated lights (IP65 for anything sitting in open rain). A typical house front is then done for somewhere between $50 and $120.
This guide is the lighting half of the Halloween setup. The handmade pieces themselves, the tombstones, jar luminaries and ghosts that these lights will show off, live in our DIY Halloween decorations guide. This one is about choosing the lights, putting them in the right places, and wiring them up safely. Halloween falls on Saturday 31 October this year, and one full weekend is left to install.

The Main Types of Outdoor Halloween Lights, and What Each Is Actually For
In fact, most disappointing displays come from buying five of the same thing. Each type below does one job well but looks wrong doing the others.
String lights
The workhorse. LED mini strings in orange or purple outline railings, door frames, fences and rooflines. For example, a 100-count LED strand is usually about 33 feet long. It costs $8 to $14 and uses roughly 5 watts. Bigger C9-style LED bulbs read better from the street and suit the roofline. Each strand is shorter, about 16 feet for 25 bulbs, and costs $15 to $25. So buy strings that say “connectable” and check the end-to-end limit on the box. Most LED strings allow 10 or more linked together, while older incandescent strings often allow only 3 to 5.
Icicle lights
Short drops hanging from a strand, made for gutters and porch edges. White and blue icicles are everywhere. Orange and purple ones exist but sell out first. Buy them before mid-October if your plan needs them. For example, one strand typically covers about 6 feet of gutter and costs $10 to $18. They hang from cheap plastic gutter clips, around $5 to $8 a pack, so never use staples.
Net lights
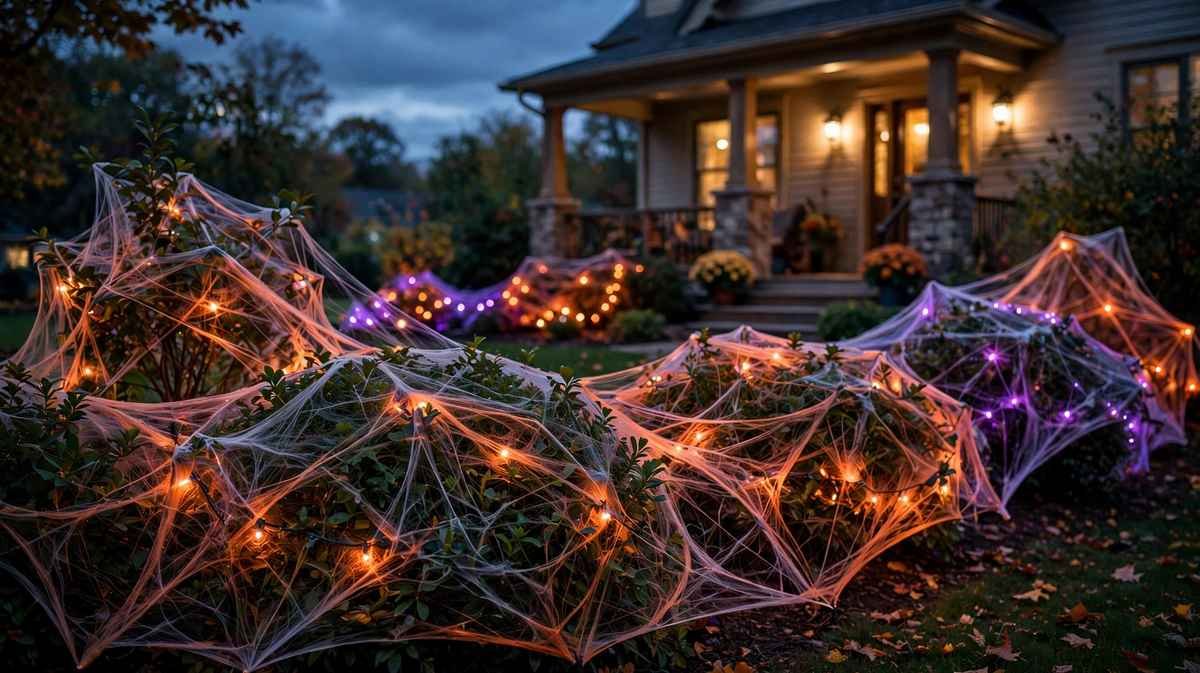
A grid of lights on a mesh, usually about 5 by 4 feet with 100 lights. It is made to be thrown over a bush in under a minute. This is the single biggest effort-to-effect ratio in outdoor lighting. There is no wrapping and no weaving. The coverage looks even because the spacing is fixed by the net. One net covers one medium bush. Expect $12 to $20 each.
Projection lights
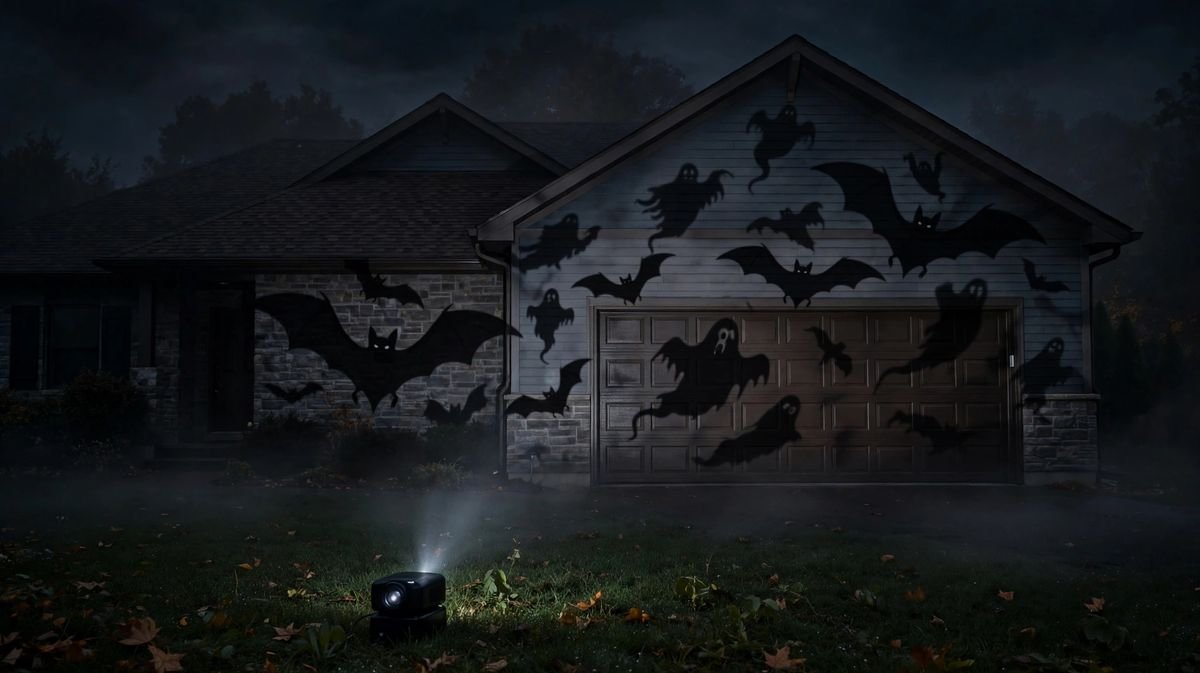
A single stake unit throws moving bats, ghosts, spiders or a swirling color wash across your house front. Basic models cost $20 to $40, so they are the fastest full-house effect that exists: one unit, one stake, done. However, the honest limits are real. A projector covers a wall about 20 to 30 feet wide when placed 15 to 25 feet back. A bright white porch light competing with it makes the image look faint. It also needs a fairly flat, light-colored surface to read clearly.
Pathway lights
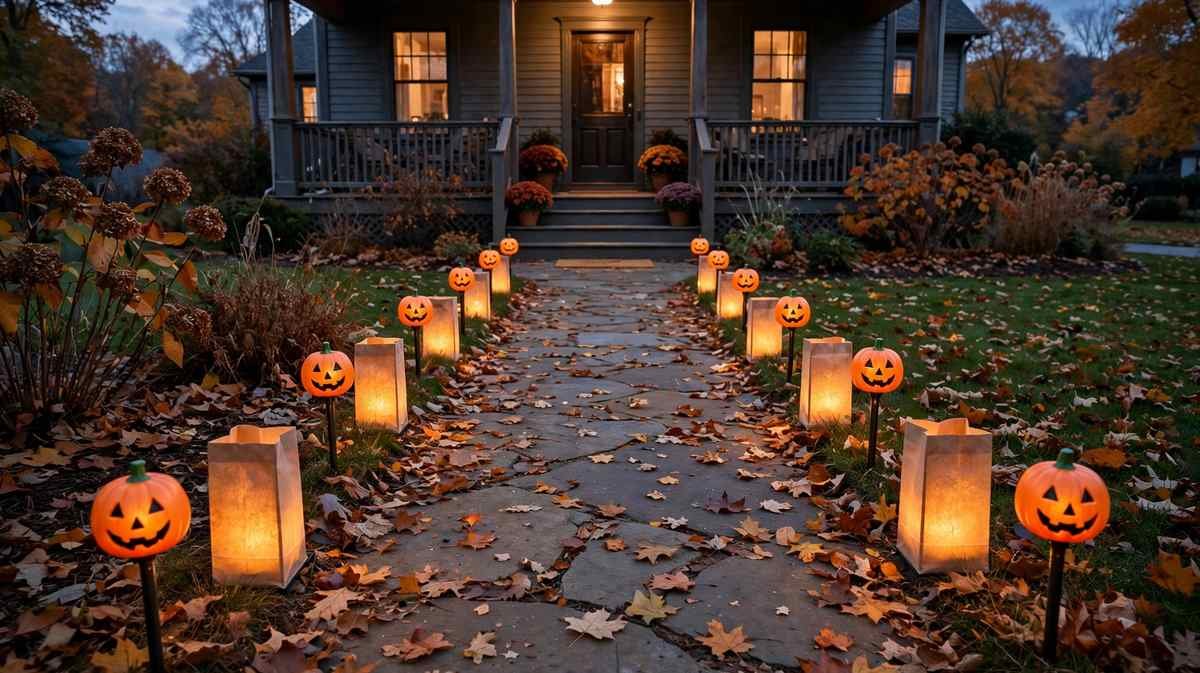
Short lights on stakes that sit along the walkway and driveway edge. Solar versions come in packs of 6 to 8 pumpkin or plain stakes for $15 to $25. They need no wiring at all. Plug-in versions cost more and need a cord run, but they stay at full brightness all evening. Keep spacing to 4 to 6 feet for a continuous guiding line, because wider than that the path reads as random dots.
Spotlights
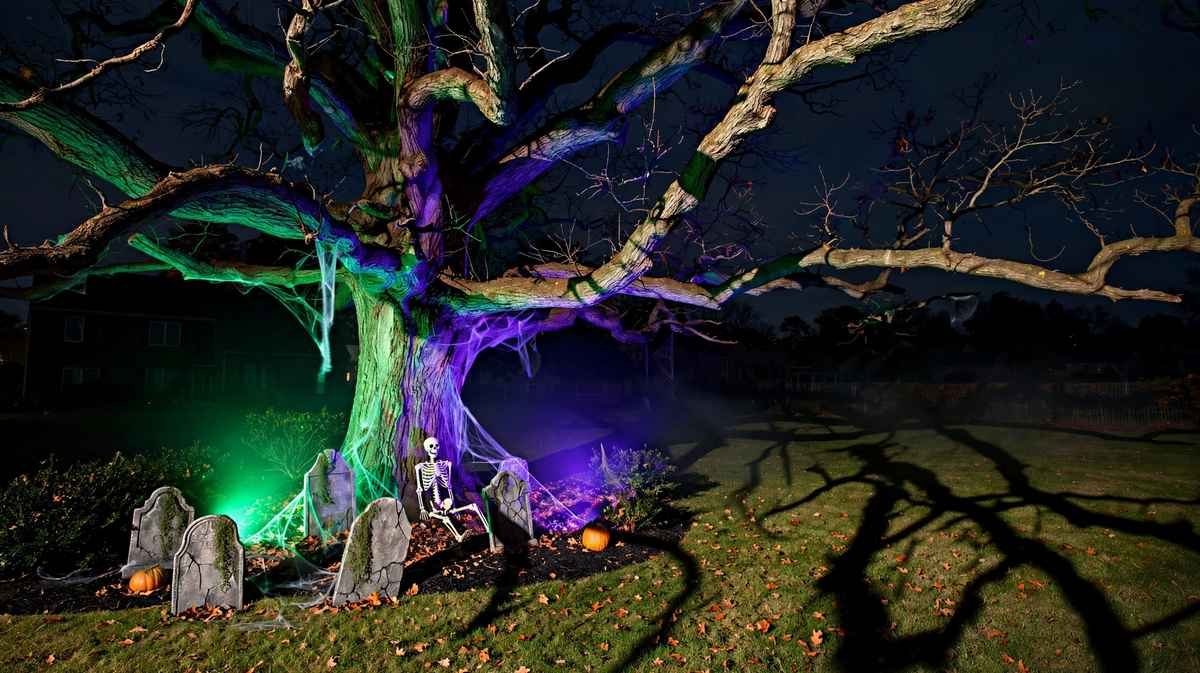
Ground-stake spots that throw a focused beam upward or across. For example, colored LED versions run $10 to $18 each. Their job is drama. For instance, uplighting a tree, washing a tombstone cluster in green, or turning the big inflatable purple. One spot per feature is the rule, because three spots on one tree looks like a car dealership.
Smart bulbs and flame bulbs
Two small upgrades that punch above their price. A color smart bulb ($10 to $15) screws into your existing porch fixture. It turns the whole doorway orange or purple on a schedule, with no new hardware. A flicker-flame bulb does the same socket trick for lanterns and porch lights. It imitates a candle flame that never blows out. Both also pair well with the smart plug in the timer section below.
Before You Buy: The Three Numbers on the Box That Actually Matter
IP rating
IP ratings say how much water a light can handle, so memorize these two numbers:
- IP44: handles splashes and rain at an angle. Fine for a covered porch or under the eaves.
- IP65: handles direct rain jets. The minimum for anything sitting in open weather: yard, tree, walkway.
Indoor-only lights are the cheapest and most tempting, but they are the ones that fail first. Therefore, anything without an IP marking on the box stays indoors. In fact, this is the single most common reason a display dies after one October storm.
Wattage
An old incandescent C9 bulb burns 7 watts each, so one 25-bulb strand pulls 175 watts. A full LED display, six strings, two spotlights and a projector, usually totals 60 to 90 watts for the entire house. Run that 5 hours a night for the last 10 nights of October. As a result, you will have used roughly 4 kilowatt-hours: well under a dollar of electricity. Overloading a circuit, the classic fear, is close to impossible with LEDs. Still, add up the wattage if you are mixing in old incandescent strands or an inflatable with a fan motor.
Connectable limits
Every string has a maximum number of strands that can be linked end to end. You will find it printed on the box and the tag near the plug. Going past it overheats the first plug’s fuse, which is the top cause of a brand-new display dying on night one. If your roofline run is longer than the limit allows, then split it into two runs fed from two outlets or a multi-tap outdoor cord.
The Zone Plan: What Goes Where on a Typical House Front
Decorators think in layers, but homeowners are better served by zones: four zones, each with one job. So pick a color palette of two colors maximum across all four, three if one of them is warm white. Orange plus purple is the classic pairing. Green plus purple reads more haunted. Orange alone with warm white is the friendliest option for streets with very young trick-or-treaters.
Zone 1: The porch (strings and the door)
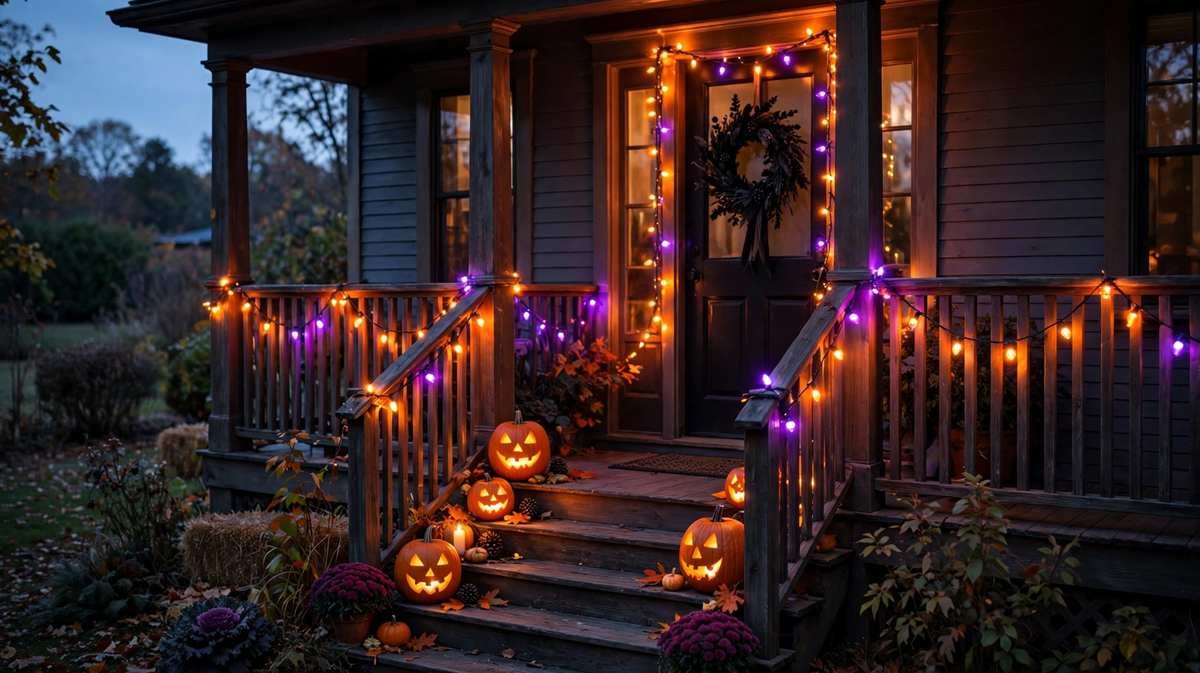
This is where every visitor ends up, so it gets warm, bright and tidy light. Run one or two 33-foot string strands around the door frame and along the railing. Put a flicker bulb or a color smart bulb in the porch fixture. Then cluster your pumpkins where the string light spills onto them. Styling the porch beyond lighting? Wreaths, seating and step arrangements are covered in our room-by-room Halloween home decor ideas.
Zone 2: The path and driveway (low lights, safety first)
This zone is lighting first and decoration second. Trick-or-treaters in masks with limited vision will walk this route in the dark, in costumes that tangle. Line both sides of the walk or stagger one side every 4 to 6 feet. Keep every light below knee height and aimed down, never at face level. Solar stakes are acceptable here as accents. If the path is your only route to the door, however, plug-in lights earn their cord. Late-October days are short, so solar panels charge weakly. As a result, cheap solar stakes often fade by 8 or 9 pm, right when traffic peaks.
Zone 3: The yard and tree (the drama zone)
Pick one or two features, not six. A tree gets one colored spotlight aimed up into the branches so the shadows move in the wind. Give a tombstone cluster one spot placed low in front of it, a few feet back. The stones will then throw long shadows behind them. The projector, if you have one, owns the house wall and garage door. Nothing else bright should compete on that same surface. Everything else in the yard stays dark on purpose, because the contrast is what makes the lit pieces look expensive.
Zone 4: Bushes, fence and filler (nets and wraps)
Net lights go over the bushes, one net each, tucked at the edges so the mesh disappears. For a tree, wrap the trunk only, spiraling one strand upward, instead of trying to wrap branches from a ladder. Similarly, a fence line takes a single string run along the top rail. This zone is filler, not focus. Its job is to stop the yard looking empty between the porch and the props. It also carries your two colors to the edges of the property.
Timers and Smart Plugs: Set It and Forget It
After all, a display you have to remember to switch on is a display that is dark on the one night it matters. Therefore, everything wired should run through a single control point.
The mechanical timer ($8 to $12) is the reliable default. The better models have a light sensor: on at dusk, off after 2, 4, 6 or 8 hours. No app, no Wi-Fi, nothing to update. Set it to dusk plus 6 hours. The display then covers the whole trick-or-treat window and shuts off before midnight.
The outdoor smart plug ($15 to $25) is worth it if you want schedules that follow sunset automatically. You can also control it from your phone. There are two buying rules. First, it must be rated for outdoor use, because an indoor smart plug in a damp outlet box is a failure waiting for rain. Second, check its maximum load: usually 15 amps resistive, which a full LED display will not approach. The same color-bulb tricks that work on the porch scale up indoors too, as our LED room decor ideas show.
The one-master-switch layout is what makes either option work. Run the porch strings, spotlights and projector back to one outdoor power stake. Or use one heavy-duty outdoor cord on the timer or smart plug. The entire wired display is then one schedule and one switch. Meanwhile, solar stakes look after themselves. On Halloween night your whole job is then just watching it work.
Outdoor Electrical Safety: The Rules That Prevent Fires and Shocks
Power first: cords, outlets and connections
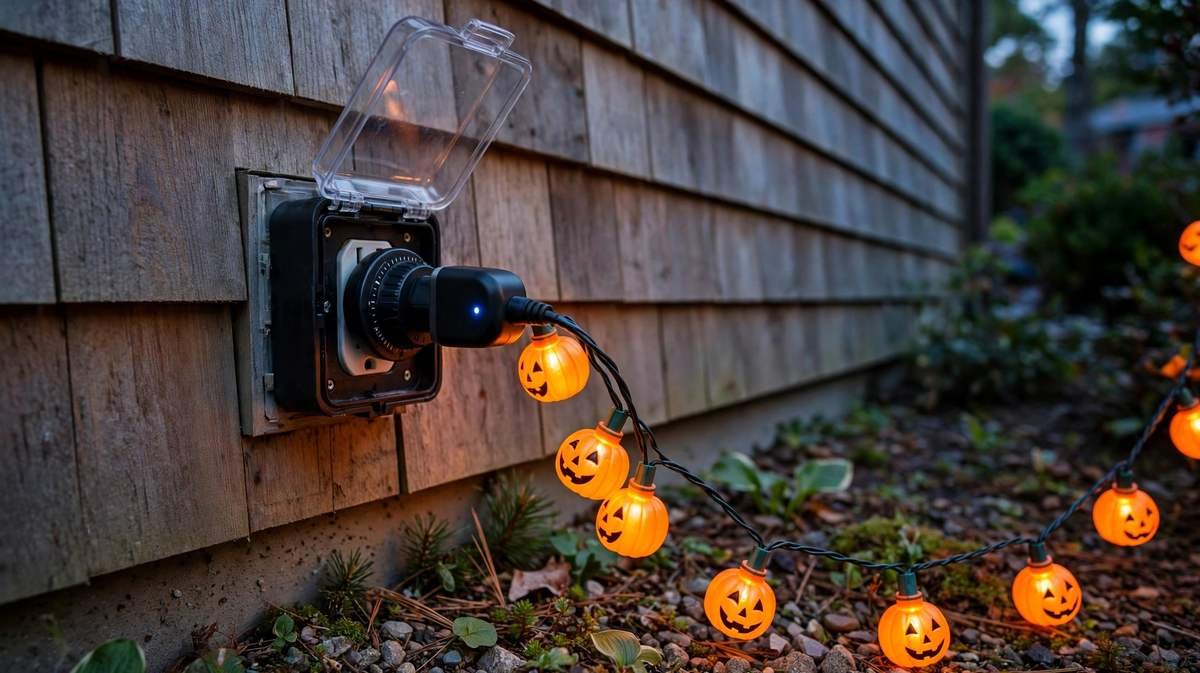
- Outdoor-rated cords only, because the label matters more than the color, but orange or green outdoor cords are easiest to spot later. For example, a 16-gauge outdoor cord handles any LED display over runs up to about 50 feet. Instead, use one cord per run rather than chaining two short indoor cords together. After all, every mid-lawn connection is a place for water to get in.
- Plug into a GFCI outlet. Exterior outlets should already be GFCI-protected (the kind with the small Test and Reset buttons), so press Test, then Reset, before setup day to confirm it works. If it trips during the display, something got wet. Therefore unplug, let the connections dry, and reset rather than repeatedly forcing it back on.
- Keep connections off the ground. Plugs and strand-to-strand joints should sit on a brick, a stake or inside a $8 to $12 weatherproof connection box. Never leave them in a puddle line or a mulch bed that holds water. Instead, form a small drip loop and let the cord dip below the outlet before rising to it. As a result, rain runs down and off instead of along the cord into the socket.
Placement next: ladders, walkways and heat
- Never staple or nail through a cord. Instead, hang roofline and gutter runs on plastic clips made for the job, because a staple through insulation is a short circuit scheduled for a rainy night.
- Cords and walkways. Route cords along edges, flower bed borders and fence lines. If a cord absolutely must cross a path, run it flat. Then tape it down with outdoor gaffer tape or use a rubber cord cover. Finally, put a path light right beside the crossing so people can see it.
- Ladder common sense. Roofline icicles are optional, and a display without them still works. If you do hang them, use a helper footing the ladder and work in daylight. Then clip from the ladder rather than leaning out along the gutter. Never hang lights standing on the top two rungs. Also, never drape a strand while it is plugged in.
- Heat and dry leaves. LED lights run cool and are safe near fabric webs and foam props. Old incandescent C9 bulbs run hot, however. Keep them clear of dried leaf piles, paper luminaries and cheesecloth. In addition, never bury any bulb type under fallen leaves.
What Outdoor Halloween Lights Cost: Three Real Budgets
These are buy-it-all prices for a typical single-story house front. However, if you already own cords and a timer, subtract $20 to $35.
Budget ($50 to $75): 2 string strands, 6 solar path stakes, 1 net light, 1 basic mechanical timer.
- 2 string strands ($16 to $28)
- 6 solar path stakes ($15 to $25)
- 1 net light ($12 to $20)
- 1 basic timer ($8 to $12)
Standard ($100 to $140): 3 to 4 string strands, 8 to 10 path lights (mix of solar and plug-in), 2 net lights, 1 to 2 spotlights, 1 outdoor smart plug.
- 3 to 4 string strands ($24 to $50)
- 8 to 10 path lights ($20 to $40)
- 2 net lights ($24 to $40)
- 1 to 2 spotlights ($10 to $36)
- 1 outdoor smart plug ($15 to $25)
Full display ($180 to $250): everything above plus a $20 to $40 projector, 1 extra spotlight, 1 icicle strand for the gutter.
The Setup Sequence: Saturday Build, Week of Tweaks
Halloween is on Saturday 31 October this year. As a result, the weekend of 24 and 25 October is your installation window. The week between is then for the lights to simply run themselves.
Saturday: build the display and aim the lights
Saturday morning (indoors, one hour): the test everything step. First, plug in every strand in the garage or living room, one at a time. Then replace anything dead or half-dead now, while the shops still have stock and returns are easy. Meanwhile, charge solar stakes in full sun all day. Next, set up the projector against a garage wall or a sheet. Finally, learn its focus and distance before it is dark and you are standing in the yard guessing.
Saturday afternoon (two to three hours): hang high, then low. First, start with roofline and gutter clips while energy and daylight are both good. Then add porch strings, net lights over bushes, ground-level spotlights and path lights. Next, run the cords last, loosely, back to the single timer or smart plug. Nothing gets taped, tied or buried yet, because adjustments are coming at dusk.
Saturday at dusk (thirty minutes): the aiming session. In fact, this is the step almost everyone skips and the one that matters most. Next, switch everything on. Aim the spotlights from the street side, not from beside the fixture. Stand across the street and judge the whole picture. Is the path clearly lit and the projector readable? Is any bulb glaring into the eyes of someone walking up the path? Fix angles now, then set the timer or smart schedule, dusk to about 11 pm.
The week after: let it run, then rehearse
Sunday to Thursday: the display runs on its schedule and you watch for problems. Note anything that looks dim, anything that aimed wrong once it is dark, and any timer drift. However, resist the urge to redesign. Small fixes only.
Friday 30 October (fifteen minutes at trick-or-treat time): the dress rehearsal. Same time of evening as the real thing. Then walk the route a child will walk, from street to door, wearing your eyes at four feet tall. Finally, check the steps are visible, nothing crosses the path at ankle height, and the porch is welcoming rather than blinding. Then on Saturday 31 October there is nothing to install, because the lights come on at dusk automatically. Finally, keep one spare strand in a kitchen drawer, along with the little slide-door of spare fuses from your string plugs.
Troubleshooting: When Half the Display Goes Dark
Power problems: dead sections and tripped GFCIs
Half a string is out, the other half works. LED and modern mini strings are wired in sections, so one loose, pushed-out or corroded bulb kills its section, commonly 25 or 50 lights. Therefore, start at the first dark bulb nearest the lit part and reseat or swap it. If the whole strand is dead instead, check the tiny fuse inside the plug, because most string plugs have a little sliding door with one active fuse and one spare. First, swap in the spare before you blame the strand.
Everything went out after rain. The GFCI almost certainly tripped, which means it did its job. First unplug the display and shake water out of any connection sitting low. Then raise connections onto a brick or into a connection box. Next, let things dry and reset the GFCI. If a display trips the GFCI every rainy night, however, it has a damaged cord or a cracked bulb somewhere, so find it in daylight rather than resetting nightly.
Performance problems: solar, projector and brightness
Solar path lights fading by 8 pm. Short days, low sun and a house shadow mean the panel never fully charged. Move the stake to the sunniest spot you have and wipe the panel clean. Then accept that the last week of October is simply weak solar season. For the main route to the door, however, this is the case for plug-in lights.
The projector looks blurry or washed out. There are two causes, in order. First, it is too far away for its brightness, so move it to 10 to 15 feet from the wall and refocus. Second, a white porch light or streetlight is competing with it. Therefore swap the porch bulb to orange, dim it, or shield it. The projection will then sharpen up.
Street can barely see the display. Small mini lights vanish past about 40 feet, so that is what C9 bulbs, spotlights and the projector are for. If the house reads dim from the road, add one more spotlight on the biggest feature rather than more strings.
Six Mistakes That Ruin an Outdoor Display
Buying all one type means five strands of mini lights and nothing else, which is a glowing outline with no depth. Instead, mix strings, one projector or spotlight, and low path lights.
Only lighting the porch is a mistake, because the porch is the last 10 feet of the experience. The street sees the yard first, so give it at least the tree or the projector.
Skipping the timer means a display that needs you to remember is dark on the nights you forget. Therefore, the $10 timer is the highest-ROI item on this list.
Hanging lights with staples is asking for trouble, because every staple is a future short. Use the clips instead.
Ignoring the IP rating is risky, because indoor strands die in the first storm. Check the box instead.
Starting on the 31st is the classic error, because daylight setup is the whole game. So build on the weekend before.
Takedown and Storage in One Trip
Take the display down zone by zone in reverse order. Projector and spots first, nets and strings last. While each strand is still in your hands, wrap it around a piece of cardboard or your forearm and elbow. Then flag it with masking tape labeled by zone. Writing “porch door frame, 2 strands” takes ten seconds and saves the entire measuring job next year. Test each strand once more before it goes in the bin, because storing a dead strand is just scheduling a problem. Finally, timers, clips, fuses and the smart plug go in the same bin on top. To keep seasonal pieces sorted year-round, see our notes on handling seasonal home decor without creating clutter.
Frequently Asked Questions
How many lights do I need for a typical house front?
For most single-story fronts, start with 2 to 3 string strands (about 100 feet total) for the porch and one outline run. Then add 1 net light per bush (usually 2), 6 to 10 path lights, and 1 to 2 spotlights. Add a projector only if you want a wall effect. That list, around $120 of gear, covers all four zones in this guide.
Are solar Halloween lights bright enough for the walkway?
As accents, yes, but as the only path lighting, usually not by late October. Short, often cloudy days mean weak charges, and many budget stakes fade by 8 or 9 pm. Use solar for the driveway edge or garden border, and plug-in lights for the route children actually walk.
What does IP65 mean on outdoor lights?
IP65 means the light withstands water jets from any direction, so rain is no problem. IP44 handles splashes only, which suits a covered porch. IP65 withstands direct rain jets, which is what yard, tree and path lights actually face.
Can outdoor Halloween lights stay up in the rain?
IP65 lights, yes. Rain problems come from connections, not bulbs. Therefore look for plugs lying in wet mulch, strand joints in puddle lines, or cords running into a non-GFCI outlet. Raise the connections, use a connection box on the main joint, and let the GFCI do its job.
When should I put up outdoor Halloween lights?
Any time in October works. However, the first two weekends are the relaxed option, with full store stock and mild weather. The final full weekend, 24 and 25 October this year, is still fine. Just follow the test-first sequence in this guide. However, what does not work is starting on the afternoon of the 31st.
How much electricity do outdoor Halloween lights use?
Very little. In fact, a full four-zone LED display of about 80 watts, run 5 hours a night for 10 nights, uses about 4 kilowatt-hours. That costs well under a dollar at average US rates. In addition, even a whole month of evenings lands around $1 to $2. However, the projector and any inflatable fan motor draw more than the lights do.
Final Thoughts
In the end, outdoor Halloween lighting is a planning problem dressed as a shopping problem. First, decide the two colors and light the path like it matters. Then give the yard one or two spotlit features. Next, throw nets over the bushes and put the whole thing on one timer. Finally, do the testing on the Saturday before, in daylight, and Halloween night itself becomes the easiest part of the month.

Hi, I’m Ashir Zahid! I’m a home décor writer and creative enthusiast who loves finding simple and beautiful ways to make everyday spaces feel more comfortable and inviting. I enjoy exploring home styling ideas, practical decorating tips, and timeless trends that can work in real homes without making things feel complicated.
At DailyHomeVibe, I share easy-to-follow ideas for decorating different rooms, choosing the right colors and textures, and giving your home a fresh look with thoughtful details. My goal is to help readers find inspiration they can actually use, whether they are refreshing one small corner or giving their whole home a new feel.