
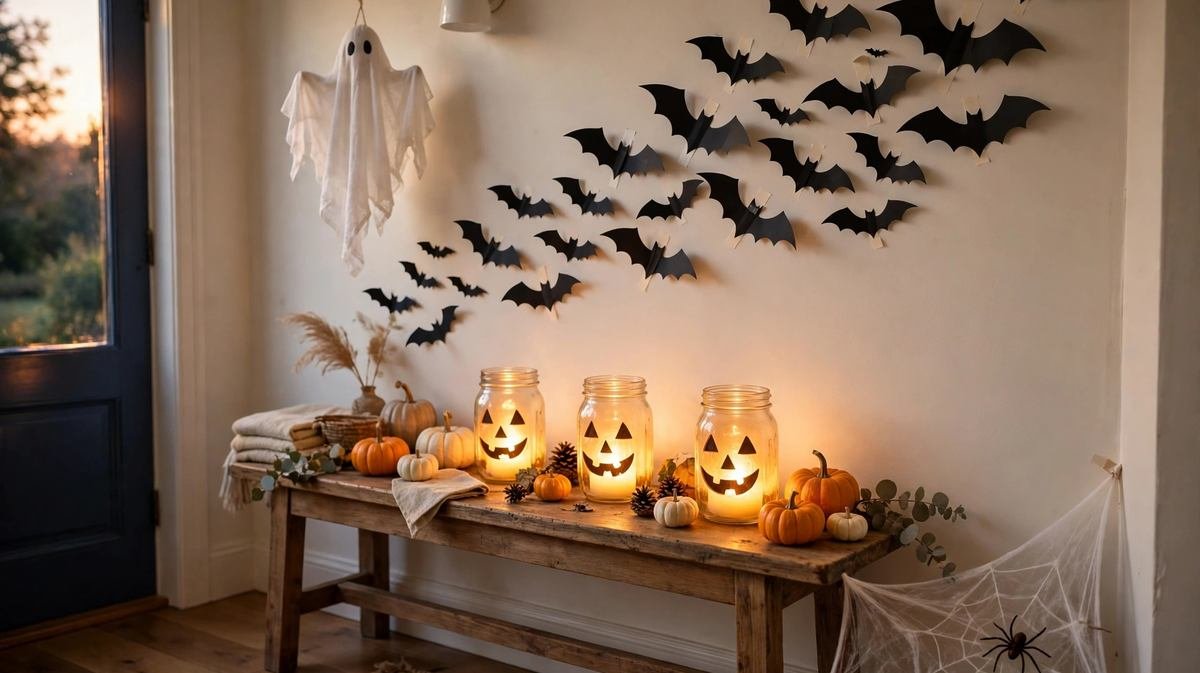
Halloween is ten days away, and yes, you can still decorate your home properly without a big store run or a big budget. The 12 DIY Halloween decorations below cost about $25 in total if you start from zero, and most of them use things already in your kitchen drawers: jars, cardboard, paper, old sheets. Every project lists exactly what you need, what it costs, how long it takes and the steps in order, so you can pick three tonight and have a finished-looking home by bedtime.
One honest note before the projects: this guide is the hands-on companion to our room-by-room Halloween home decor ideas, which covers styling, color palettes and where displays look best. That post plans the look. This one builds the pieces.
Before You Start: One $25 Supply Run and a Time Plan
Most DIY lists fail at the same point: they never tell you what to buy, so you make three trips and overspend. Buy this once, or pull the equivalents from home first.
The shopping list (dollar store prices, roughly $22 to $25 total):
- Black construction paper or cardstock, 1 pack: about $1.25
- Black trash bags, 1 box: about $1.25 (you probably own these)
- Battery tea lights, 8 to 12 pack: about $3 to $5. Buy these before anything else; they power four projects below
- Cheesecloth, 1 pack: about $1.25
- White glue and a glue stick: about $2.50
- Painter’s tape or removable mounting putty: about $2.50
- Acrylic paint set with black, white, gray and orange, plus 2 cheap brushes: about $5
- Paper or plastic spiders, 1 bag: about $1.25
- Orange tissue paper, 1 pack: about $1.25
- String or twine: about $1.25 (kitchen string works)
Pick your plan, because drying time decides the order:
- The 30-minute rescue: Bat swarm (Project 1), trash-bag webs (Project 3), monster door (Project 12). No paint, no drying, everything hangs or tapes up.
- The 2-hour version: Start the tombstones (Project 7) first so the paint dries while you cut bats and fold webs, then finish with the jar luminaries (Project 4).
- One full evening: All 12, worked in this order: paint projects first (7, 8, 9), paper projects while they dry (1, 2, 3, 11), glow projects last (4, 5, 10), door and ghosts at the end (6, 12).
That sequencing is the whole secret. Paint is never the bottleneck if it goes on first.
Walls, Windows and Webs
1. Paper Bat Swarm
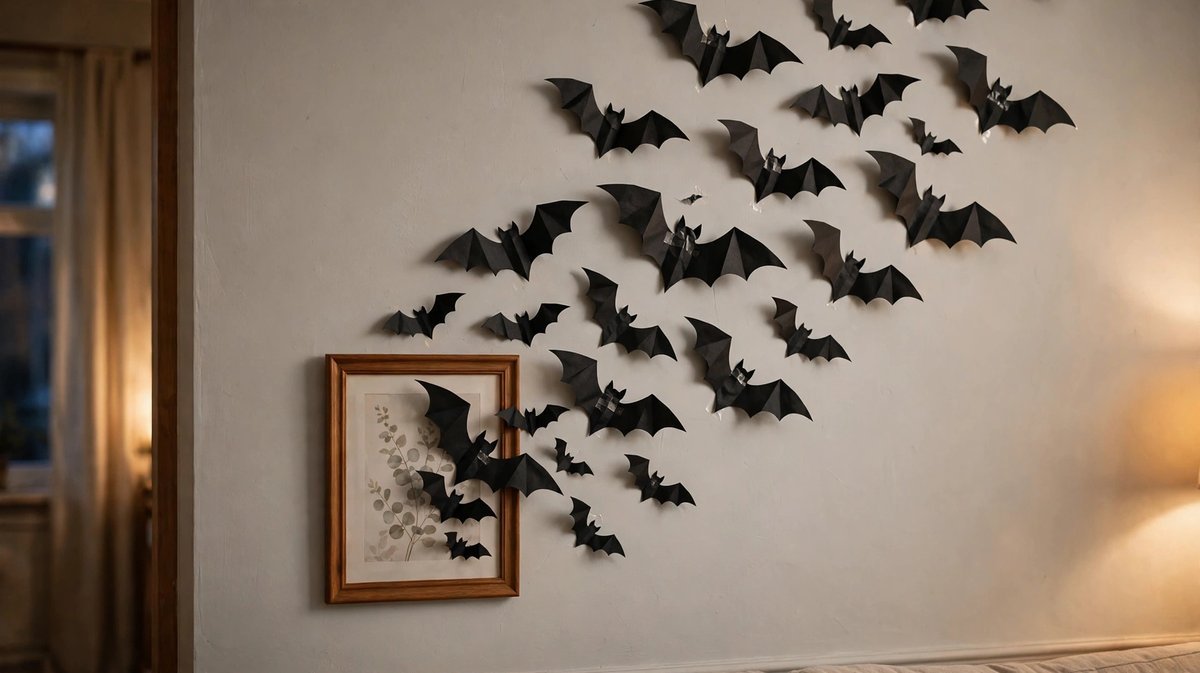
The highest-impact project on this list for the lowest cost. A trail of bats flying across one wall makes a plain room look deliberately decorated.
- You need: Black construction paper or cardstock, scissors, pencil, painter’s tape or removable putty
- Cost: About $1.25 if you buy the paper, free from a recycling pile of black card
- Time: 25 to 30 minutes for 20 to 30 bats
- Steps:
- Draw one bat shape and cut it out as your template. Make it about 10 inches wide; the swarm looks best in three sizes, so shrink and enlarge the same outline to roughly 6 and 14 inches.
- Fold the paper in half, trace half-bats along the fold and cut. You get a symmetrical bat every time, and cutting takes half as long.
- Cut 20 to 30 bats total. Fewer than 15 looks accidental; more than 40 gets busy.
- Crease each bat gently down the center of its body and fold the wings slightly forward. Flat bats look like stickers; folded bats cast shadows and look like they are flying.
- Arrange the trail on the floor first, flowing up and out of a corner, a picture frame or a doorway, biggest bats at the start, smallest at the tail.
- Fix each bat with a small loop of painter’s tape or a pea of putty behind the body only, never on the wing tips.
- Looks best: Living room wall above the sofa, a hallway, or streaming out of the front door frame.
2. Window Silhouettes and Monster Eyes
Your windows advertise the house to the whole street after dark, and they cost you one sheet of paper each.
- You need: Black paper or cardstock, scissors, painter’s tape, one lamp or room light behind the window
- Cost: About $1
- Time: 15 minutes per window
- Steps:
- Choose big, simple shapes: a cat sitting up, a witch hat, a haunted house outline, or two huge oval eyes with round pupils.
- Draw the shape at least 12 inches tall. Small silhouettes vanish from the street; oversized ones read clearly.
- Cut and tape the shape to the inside of the glass with small tape loops at the corners.
- For monster eyes, tape two white paper ovals about 10 inches tall in an upstairs window and add black pupils looking down at the street.
- After dark, turn on the room light or place a lamp behind the window and check the effect from outside. Adjust any shape that reads as a blob.
- Looks best: Front-facing windows, especially an upstairs pair done as eyes.
3. Trash-Bag Spiderwebs
Store-bought webbing in a bag looks thin and sad. A web cut from a trash bag has real structure and reads from across the room.
- You need: Black trash bags, scissors, painter’s tape; optional plastic spiders
- Cost: About $1.25, or free if the bags are already under your sink
- Time: 10 minutes per web
- Steps:
- Cut one bag open along the seams so it lies flat as a single sheet, then trim it into a rough square.
- Fold the square in half diagonally, then fold that triangle in half twice more, like a paper snowflake.
- Cut curved strips out of the folded edges, leaving the folded spine connected. Three or four arcs per edge is enough; cutting too much makes it collapse.
- Unfold slowly. Trash-bag plastic clings to itself, so open it over a table, not in mid-air.
- Tape the web across a corner, over a mantel edge or diagonally in a window, pulling it gently taut at four or five points.
- Tuck one or two plastic spiders into the strands. One spider looks intentional; ten look like a spill.
- Looks best: Corners, mantels, mirrors and the dead space above a doorway.
- Safety note: Keep webs well away from candle flames, hot bulbs and heaters. Plastic melts before it burns, and both are bad outcomes.
Glow Projects: Jars, Jugs and Candles That Are Not Candles
Every project in this section runs on battery tea lights. That is deliberate. Paper, tissue and cheesecloth sit close to these lights, so real flames are not an option anywhere in this guide.
4. Mason Jar Jack-o’-Lantern Luminaries
- You need: Clean glass jars with lids removed, orange tissue paper, white glue thinned with a little water, a brush, black paper or a black marker, battery tea lights; optional green ribbon
- Cost: About $2 if the jars come from your recycling; tissue and glue are on the supply list
- Time: 25 minutes, plus 30 minutes of drying you do not have to watch
- Steps:
- Tear the tissue paper into strips about an inch wide. Torn edges blend; cut edges leave visible lines.
- Brush the glue mixture onto the outside of the jar in sections and lay the strips on, overlapping slightly, until the jar is fully covered. One layer glows best; two layers turn muddy.
- While it dries, cut eyes, noses and mouths from black paper, triangles and zigzags, or simply draw them on with a marker once the surface is dry to the touch.
- Tie green ribbon or twine around the rim as the pumpkin stem detail.
- Drop in a battery tea light and switch it on. The face glows from inside, and the jar is safe on any surface.
- Looks best: Lined up on a mantel, a windowsill, porch steps or as a table centerpiece in odd numbers: three or five, never two.
- Variation: White tissue makes a ghost jar, purple makes a great monster face. A mixed row of three characters looks better than three identical pumpkins.

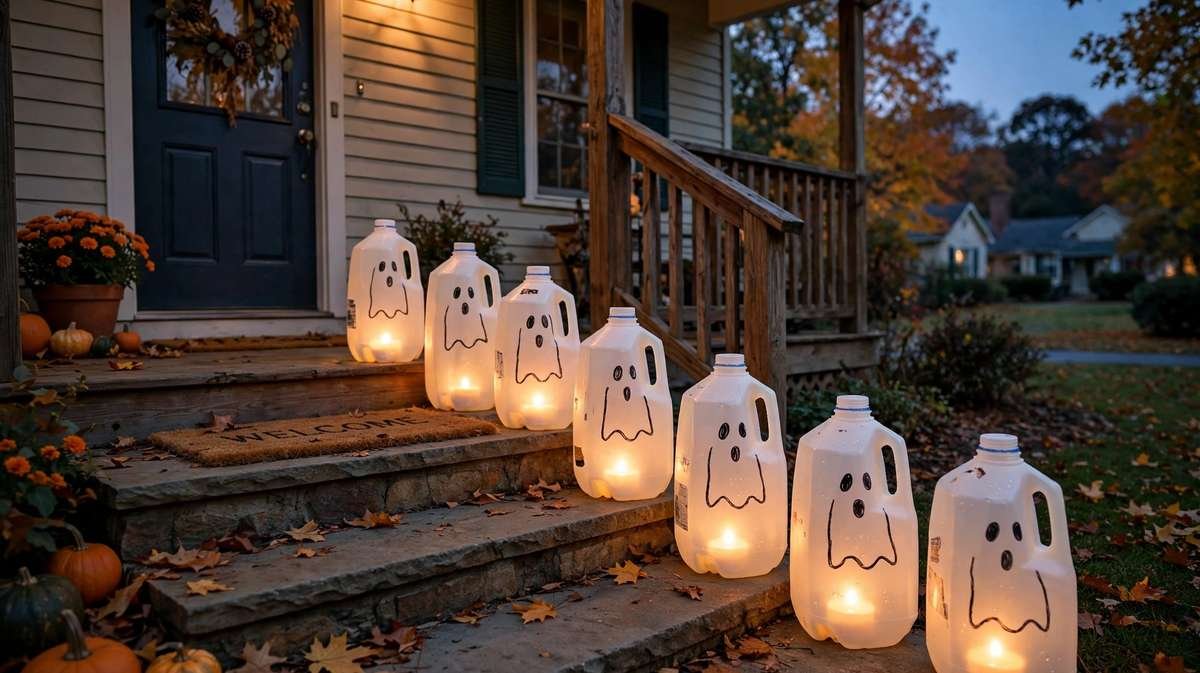
5. Ghost Milk Jug Path Lights
- You need: Translucent plastic milk or water jugs, rinsed and dried, black marker or black paper, battery tea lights or a short string of battery fairy lights
- Cost: Free if you save jugs for a week
- Time: 5 minutes per jug
- Steps:
- Peel labels and wash the jugs; any milk residue clouds the glow.
- Draw a simple ghost face on the flat side away from the handle: two oval eyes and a round open mouth. Keep it simple, because the light blurs fine detail.
- Cut a small flap in the back, low down, big enough to slip a tea light in, or drop fairy lights through the cap opening.
- Line the jugs along the porch edge or path, faces out. Five or more in a row looks like a ghost parade; a single jug looks like recycling that escaped.
- Weight each jug with a handful of gravel or a little water if it is going outside, or the first windy night ends the display.
- Looks best: Porch steps, garden path, or a dark hallway for a party.
6. Hanging Cheesecloth Ghosts
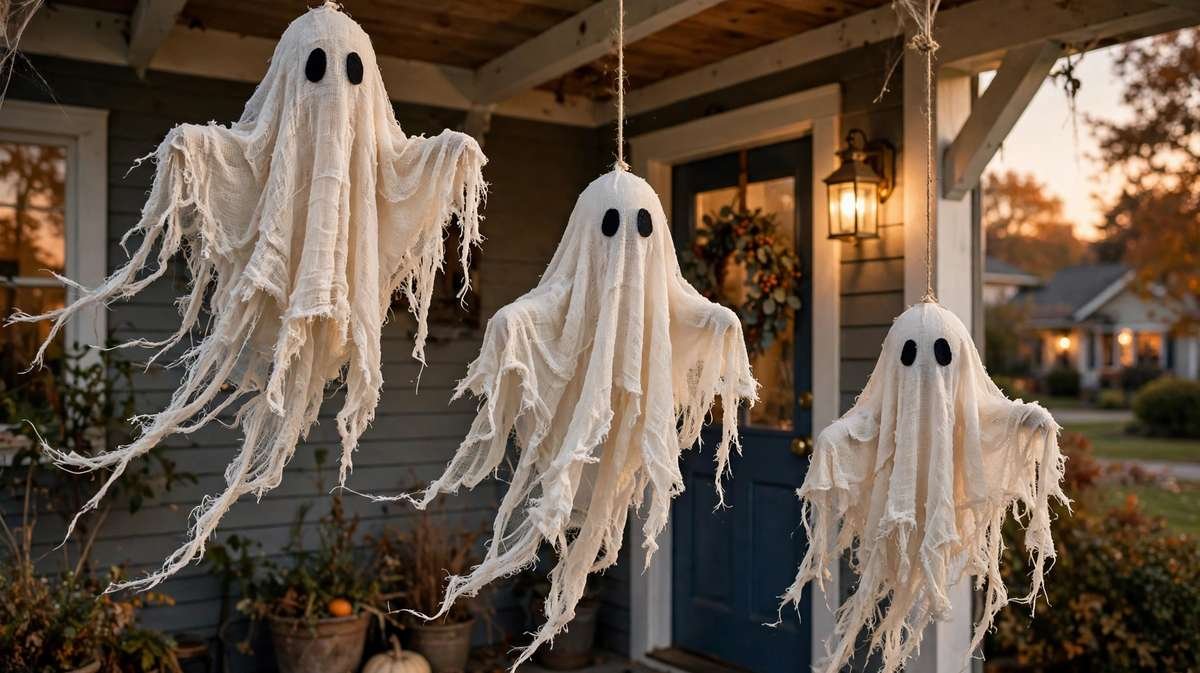
The classic floating ghost, and the project people most often overcomplicate. You do not need wire frames, balloons on stands or fabric stiffener for the small version.
- You need: Cheesecloth, scissors, black felt or paper for eyes, string, a small ball, cup or bottle to shape the head
- Cost: About $1.25 for the cheesecloth pack, which makes 4 to 6 ghosts
- Time: 10 minutes each
- Steps:
- Cut a piece of cheesecloth about 24 inches square. Cheesecloth frays into layers, so pull the layers apart slightly for a wispy edge instead of a neat hem.
- Drape it over a ball or an upturned cup so a head shape forms at the top and the cloth pools a little at the bottom.
- Glue or stick on two small black felt ovals as eyes, placed a touch higher than feels natural. High eyes look cute; low eyes look like a bedsheet.
- Thread string through the top of the head with a needle or a small safety pin and tie a hanging loop.
- Remove the shaper and hang the ghosts where air moves slightly: near a door, under a porch roof, from a ceiling hook or a tree branch.
- Looks best: Grouped in threes at different heights over an entryway or porch corner. One lonely ghost reads as laundry.
- Safety note: Hang ghosts clear of light fittings and never over a candle or stovetop. The fabric is light, floaty and flammable.
Porch and Yard Projects
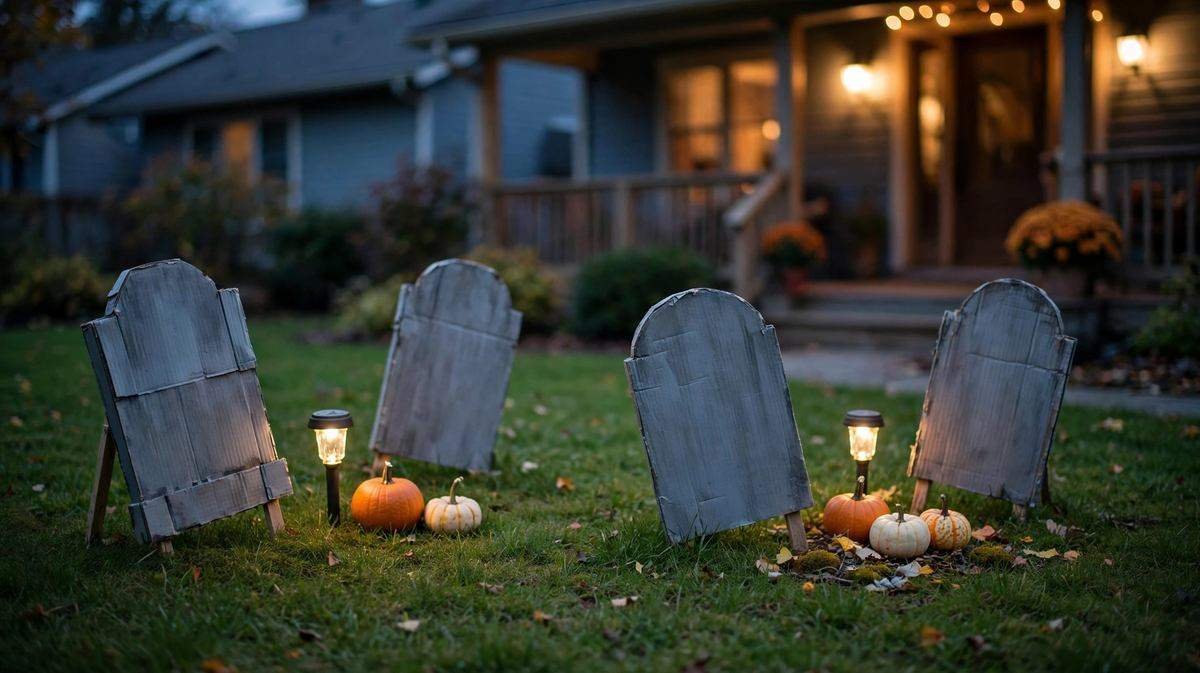
7. Cardboard Tombstones
The yard project with the best return on effort. Cardboard is free, and the paint job, not the shape, is what sells the illusion.
- You need: Large cardboard boxes, a marker, serrated kitchen knife or box cutter, gray paint, a darker gray or black for lettering, garden stakes, bamboo skewers or strong tape; optional sponge
- Cost: Free cardboard; paint is on the supply list
- Time: 40 minutes for four, most of it drying
- Steps:
- Draw tombstone tops on the flattened box: rounded, pointed or stepped. About 18 to 24 inches tall reads well from the sidewalk.
- Cut with a serrated knife using a sawing motion, and cut two identical pieces per stone. A double layer looks solid and survives being staked.
- Paint both pieces gray, front and back. Unpainted edges scream cardboard, so get paint into the corrugated edge by dabbing, not brushing.
- While the base dries, sponge a little darker gray around the edges and bottom for a weathered, mossy effect.
- Write the epitaphs last, in a darker shade with a wide brush. Funny beats scary for family streets: names like Barry M. Deep, Ima Goner, or your own family in-jokes. Keep letters big; detail disappears at ten feet.
- Tape or glue two skewers or a stake up the back, leaving 6 inches exposed to push into the ground. Set the stones slightly crooked, at uneven depths. A perfect row looks like a shop display, not a graveyard.
- Looks best: A front lawn cluster of three to five, angled toward the street, with path lights or one jug ghost from Project 5 nearby.
- Weather note: Cardboard and rain are enemies. These are fair-weather or covered-porch decorations, or one-season builds you accept losing. For a rainy forecast, move them under the porch roof.
8. No-Carve Painted and Mummy Pumpkins
All the pumpkin presence, none of the slime, the sharp tools or the three-day rotting timeline. Painted pumpkins also survive until Halloween even if you make them this weekend.
- You need: Real or foam pumpkins, acrylic paint, brushes; for mummies, white fabric strips or gauze and googly eyes
- Cost: Pumpkins are the one splurge, about $1 to $5 each depending on size; minis are cheapest and most versatile
- Time: 15 to 20 minutes each, plus drying
- Steps (painted):
- Wipe the pumpkin clean and let it dry fully; paint slides off a damp, dusty skin.
- Paint a base coat in black, white or a deep purple and let it dry before adding the face or pattern. Two thin coats beat one thick coat, which cracks as it dries.
- Add simple bold designs: a classic triangle face in the opposite color, white polka dots, or stripes following the pumpkin’s own ribs.
- Steps (mummy):
- Wrap the pumpkin in strips of white fabric or gauze, crossing at angles, and glue or tuck the ends at the back.
- Leave one horizontal gap near the top third and glue two googly eyes inside it.
- Add one loose strip hanging down. Perfection ruins the effect; mummies should look slightly unraveled.
- Looks best: A mixed cluster of three by the front door or as the table centerpiece, one painted black, one white, one natural orange.
Table, Kitchen and Five-Minute Finishes
9. Potion Bottle Centerpiece
- You need: Empty glass bottles and jars in mixed shapes, water, food coloring, paper and a pen or printable labels, twine; optional battery tea light behind the bottles
- Cost: Free from the recycling bin, plus pennies of food coloring
- Time: 15 minutes
- Steps:
- Wash the bottles and soak off the labels; a clean bottle looks like an apothecary jar, a labeled one looks like recycling.
- Fill with water tinted green, purple or amber. Two drops of coloring is plenty; too much goes opaque and loses the glow.
- Handwrite labels with crooked lettering: Witch’s Brew, Snake Oil, Dragon’s Breath, Expired Courage. Handwritten beats printed here, because the wobble looks aged.
- Tie twine around the necks and cluster the bottles in odd heights on a tray. A tea light behind the cluster makes the colors glow.
- Looks best: Dining table center or kitchen counter corner. If your kitchen is already in fall mode, it slots straight in beside these fall decorations for the kitchen.
- Safety note: These are water and coloring, but label them clearly and keep them out of reach of small children anyway; a potion bottle should never be mistaken for a drink at a party.

10. Egg-Carton Bats on a String
- You need: Cardboard egg cartons, black paint, scissors, googly eyes or white paint dots, string, a needle or skewer
- Cost: Free, plus paint from the list
- Time: 20 minutes for a string of six, plus drying
- Steps:
- Cut a strip of three connected cups from the carton for each bat.
- Cut scallops into the bottom edges of the two outer cups so they read as wings; the middle cup stays whole as the body.
- Paint the whole bat black, outside and in, and let it dry fully before handling.
- Add two eyes to the middle cup: googly eyes for a cute look, white dots with black pupils for a moodier one.
- Poke a hole in the top of the middle cup, thread the string through and tie each bat along a length, spaced about 8 inches apart.
- Looks best: Strung across a mantel, a doorway or a child’s bedroom window. This is the best project on the list to hand to kids, because crooked wings genuinely improve it.
11. Paper Pumpkin Garland
- You need: Orange paper or cardstock, green paper scraps, scissors, a black marker, string or yarn, a hole punch or tape
- Cost: About $1
- Time: 20 minutes for 10 pumpkins
- Steps:
- Fold the orange paper and cut pumpkin silhouettes about 4 inches wide, using the fold trick from the bat swarm to keep them symmetrical.
- Add a small green stem to each, glued or cut as part of the shape.
- Draw a different face on each pumpkin. A garland of identical faces looks printed; a row of mismatched grins looks handmade in the good way.
- Punch two holes at the top of each pumpkin or tape the string along the back, spacing them 4 to 6 inches apart.
- Looks best: Along a staircase rail, a mantel edge, a party table backdrop or a classroom-style door frame.
12. The Monster Front Door
- You need: Large white and black paper or cardstock for eyes and teeth, scissors, painter’s tape or putty
- Cost: About $1
- Time: 15 minutes
- Steps:
- Cut two big eyes, each about 8 to 10 inches across: white ovals with black pupils. One slightly bigger than the other adds character.
- Cut a row of white triangle teeth, long and uneven, for the top of the door and a shorter row pointing up from the bottom if your door color allows the contrast.
- Place the eyes in the upper third of the door, angled slightly inward and down, as if the door is watching visitors approach.
- Run the teeth along the top edge of the door so they hang down like a mouth about to close.
- Step back to the street and check the face reads at distance. Adjust one element only; doors fail by being over-decorated, not under.
- Looks best: Flat front doors in a solid color, especially with two jug ghosts or tombstones nearby to complete the scene. It is also the friendliest option for young trick-or-treaters who find the graveyard too much. For more ways to style the space around the door itself, see our modern entryway decor ideas.
- Renter note: Everything on this door is tape and putty. It goes up in October and leaves no trace in November, and the same applies to Projects 1, 2, 3 and 11.
Mistakes That Make DIY Decorations Look Cheap, or Fall Down
Tape that takes the paint with it. The most expensive DIY mistake is wall damage from the wrong tape. Use painter’s tape or removable putty on painted walls, always, and peel it off slowly at an angle when the season ends. Masking tape and duct tape both pull paint.
Webbing stretched too thin or dumped too thick. Commercial webbing fails both ways. Pull it until you can almost see through it for the wispy look, and use half the bag you think you need. The trash-bag webs in Project 3 sidestep the problem entirely, which is why they are in this guide.
Real candles anywhere near paper, tissue or cheesecloth. Every glow project above specifies battery lights for a reason. A real tea light inside a tissue-covered jar is a fire with a fuse. Battery candles also survive wind, children and being forgotten at bedtime.
Starting with the biggest project. If your first job is tombstones, you spend an hour watching paint dry and quit. Start paint first, paper second, assembly last, or follow the timed plans at the top.
Decorating every room a little. Three finished zones look intentional; ten half-finished corners look like a storage accident. Finish the entryway completely before touching the kitchen.
Forgetting the view from the street. Indoor projects get checked from across the room; outdoor ones from the sofa. Walk outside after dark and look at your windows, jugs and tombstones from the sidewalk. Half of all adjustments are obvious from out there and invisible from inside.
Storing It All So Next Year Is Free
Everything in this guide stores in one medium box, which is half the point of making it yourself. Paper bats, silhouettes and the garland go flat in a folder or between two sheets of cardboard. Jars wrap in the tissue paper they are already covered with. Tombstones stack flat if you remove the stakes. The only things that do not survive are real pumpkins and the trash-bag webs, and both cost under a dollar to remake. More on keeping seasonal pieces organized year-round in our guide to handling seasonal home decor without creating clutter.
Frequently Asked Questions
What is the cheapest DIY Halloween decoration to make?
The paper bat swarm. One pack of black paper costs about $1.25 and makes 20 to 30 bats, which is enough to transform a whole wall. If you already own black card or paper, the cost is zero and the time is under half an hour.
How far in advance can I make these decorations?
Paper, cardboard and fabric projects can be made two to three weeks ahead and stored flat; they do not degrade. Real painted pumpkins keep for two to four weeks uncarved, depending on heat. Make the tombstones and bats whenever you have a spare hour, and leave only the jug faces and final hanging for the last weekend.
Are these decorations safe for renters?
Yes, if you stick to the mounting rules: painter’s tape, removable putty and over-door hooks only. Projects 1, 2, 3, 11 and 12 leave no marks at all. Skip anything that screws, nails or glues to a wall, door or railing.
Which projects can kids actually help with?
Egg-carton bats (Project 10), the paper pumpkin garland (Project 11), monster eyes (Project 2) and drawing faces on the milk jugs (Project 5). Keep adults on the cutting for tombstones and on any knife work, and give children the painting and face-drawing, which is the part they remember anyway.
Can I use real candles in the jar luminaries instead?
No. The jars are covered in tissue paper and glue, and both are flammable. Use battery tea lights; the flickering versions look convincingly like flame through tissue, cost about a dollar each in a multipack, and can be left on all evening.
How long does the whole set of 12 take?
About three to four hours of actual hands-on time spread over one evening, because paint drying overlaps with paper cutting. The 2-hour and 30-minute plans at the top of this guide cover the highest-impact subsets if that is all the time you have.
Final Thoughts
You do not need a bigger budget; you need twelve projects that each take under an hour, cost almost nothing and group into a few finished zones. Start with the bat swarm and the jar luminaries tonight, add the tombstones this weekend, and your house will look decorated on purpose rather than decorated in a panic. That is the whole trick, and it costs less than one store-bought wreath.

Hi, I’m Ashir Zahid! I’m a home décor writer and creative enthusiast who loves finding simple and beautiful ways to make everyday spaces feel more comfortable and inviting. I enjoy exploring home styling ideas, practical decorating tips, and timeless trends that can work in real homes without making things feel complicated.
At DailyHomeVibe, I share easy-to-follow ideas for decorating different rooms, choosing the right colors and textures, and giving your home a fresh look with thoughtful details. My goal is to help readers find inspiration they can actually use, whether they are refreshing one small corner or giving their whole home a new feel.